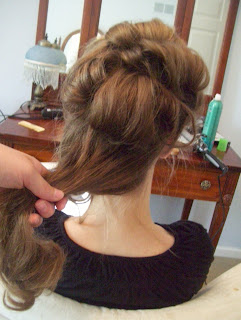
The hairstyles in period dramas can be amazingly inspirational, and there's no better accessory for a historical ensemble than the perfect hairstyle. I hope these instructions will be helpful!
Alright, to get started, part your hair from ear to ear, curving up towards the middle.

Next you're going to part the back into 3 sections and secure them.

We're going to curl the front first - this adds volume and helps hold the 'pouf'. Curl the first section rolling towards the back of the head, holding the hair straight out on the sides, and straight up along the top.

Repeat for the second section, curling hair towards the front.
Voila! Leaving the curls pinned while they cool (also known as 'setting') will help the hair to hold the body and volume.

Now we're going to curl each back section the same way.

Make sure you're always rolling the curls upward.
On the las section on the left side, keep out a strand of hair for the ringlet, and curl as shown. Pin like you did with the rest of the hair.

Now unpin the front section - see how the curls hold their shape?
Tease the hair with a fine-tooth comb, letting the hair slip through your fingers as you back comb.

Here's what it should look like. Spray after you're done.

Continue around the sides, until the whole front section is teased.

Bunch and roll the top back section, leaving plenty of hair in the front.

Roll it like this, and pin in place - you only need a few pins, don't over do it!

Now smooth the middle front section and pull gently over the pinned pouf.

Front view.

Repeat until the whole front is pinned smoothly. You can spray and smooth it now, but we'll do a touch up later.
First we'll curl the short ends leftover from the pouf. Curl towards the back and pin.

Grab a section from the right side and curl under, pinning in place to set.

Now unpin the ringlet section, and secure.

Continue around the head, rolling bottom curls upwards. Roll left side curl inward.


Now we're going to unpin the curls again, smooth them with a bristle brush, and pin them in position, starting with the short ends from the pouf. We want this curls to cover the pins that are holding the pouf in place.


Clip the upper part of the back section up out of the way, and tease the back hair a little, spraying when finished.

Now gather all the bottom section together, and twist towards the right side, like a french twist.

Secure with a few pins. Now rearrange the short ends left over from the twist, and pin in place.

Finishing touches: Tweak all the curls to your liking, re-curl your ringlet, and use a tiny curling iron to tame all those wispys!


Lovely, my dear!

A view from the top……

……and you're done!*

*White shades optional


